
This was a job I did for a lady in Rochdale, Lancashire, England.
She wanted a brand new bathroom suite fitting.
With all the associated bells, flutes and whistles to boot. But… I only had 6 days to do it.
The job came with two other major stipulations though. Firstly, this was the only bathroom in the house and it was therefore vital that she would have some means of toilet and washing facilities throughout the duration of the job. And secondly, the present bathroom layout incorporated an access trap to the loft directly over the bath which made it somewhat impossible to use ladders for it. That would need to be changed.
DAY 1.
So day one began like any other day one would. That usually means a complete rip out of the existing. But in this case, things were to be a little different. Everything was ripped out but the toilet.
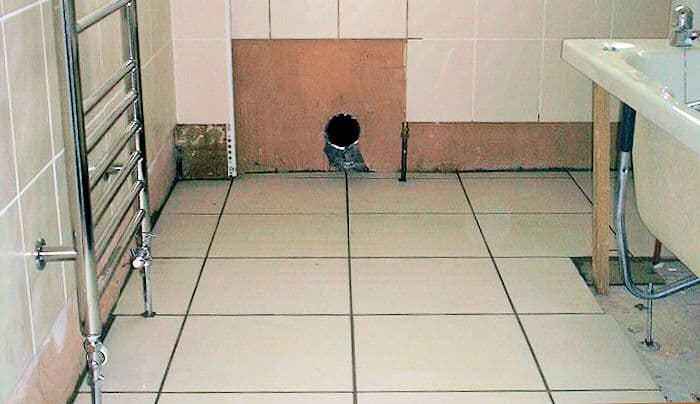
With bare but damaged walls remaining after the removal of all the tiling and wainscott panelling. Most of the walls were treated with a skim coat of bonding plaster. To help bring them back to a flat surface.
Due to the loft access trap being sited in the bathroom ceiling. It was decided early on, that the customer would have a new suspended cieling installed. So the next job was to batten out the existing ceiling in preparation. The old polystyrene tiles were left on to aid insulation.
Because I also needed to maintain washing facilities, the new bath was installed and left working. And with all that done, it was now time to start tiling. You might notice we start with the full tiles first, not the cuts. (See Tiling your bathroom like a pro).

Judging by this image, 6 days was going to be a very tall order!!


DAY 2.
Day two initially saw more tiling. But because the toilet was situated on the window wall. It was decided that the three other walls would be tiled first. All the field tiles (full ones) were installed along with the side cuts. But the top and bottom rows of cuts were omitted for now. There was a reason for this as will hopefully become apparent.
The wall with the toilet on it (the window wall) was the last to be tackled. Mainly because it meant a lot of cuts around the window. But it was all but done except for the area around the toilet. Having said that, the toilet was taken out, the wall behind it stripped and plastered and the toilet replaced for use that evening.
With the majority of the tiling now completed, it was time to start on the plastic suspended ceiling. This came with 200mm wide ‘planks’ and was just a matter of pinning it to the battens provided earlier and cutting the four halogen downlights into it. Wiring them up as I went along.
Then I returned to the tiling. The reason the top row of cuts was omitted was because it firstly allowed the fitting of the ceiling and the later tiling would cover any gaps around the edges of that new ceiling (TIP). So it was time to add the top row of cut tiles (CUTS).
Having done that, it was time to grout as much of the tiling as possible. This was in order to setup for the next day.


DAY 3.
Today was a day for plumbing. It started with the inclusion of a fitted heated towel rail. Whereby the floor had to be cut open to access the supply pipes and subsequently feed the new radiator with them. Isolation valves were added too as it was not yet time for the radiator to go live. I needed a dry installation here, for reasons I will come to later. So the towel rail was plumbed in but remained isolated, the floor replaced and another job was ticked off the to-do list.
Now it was time to remove the toilet for a second time. This was so I could overboard the existing wooden floor with plywood to supply a more stable base for the new floor tiling. That was the next job on the agenda. This involved cutting the boarding to fit and screwing it firmly down with screws at 9 inch centres.
With the plywood floor now laid, the toilet was re-installed again for the night and the washbowl and pedestal were fitted. The rest of the day would see me outside the property finishing off the external waste pipes.


DAY 4.
Hey ho, hey ho, it’s off to work we go… That toilet came out yet again and the pedestal was eased from under the washbowl. The floor tiles would be laid today so that is exactly what happened.
Now when tiling a floor, again you should start with the full tiles and finish with the cuts around the edges (TIP). The only other thing worthy of note here is that of dealing with the pipes sprouting from under the floor. There are four ways of doing this. The first and least professional, is to cut a slot into the tile as wide as your pipe is, up to where the pipe rests, and refill the remainder of the slot with your off cut. This though leaves two unsightly grout lines at the back of your pipe.
The second method is to snap the tile into two where the centre of the pipe lays, then notch out for the pipe and position the two tile pieces back together around the pipe. The result of this leaves that tile with a cracked impression which shows up more on lighter coloured tiles.
Thirdly you can hope or even plan that your tiling runs will mean that the pipe will fall on a joint whereby all you need do is notch out for the pipe on the tile edges.
This looks fairly normal and is more than acceptable but…
Lastly, and the most professional way of doing it, is to actually drill the tile in the correct location for the pipe to fit through it. Which is what I did here. But in order to lay the drilled tiles. I had to disconnect the radiator pipes from the radiator in order to thread them through. And that is why the radiator was a dry fit the day before. Later, a quick slide around under the floor below the bath would soon have the isolation valves turned on and the radiator would be fully working.
Notice I didn’t tile under the bath? When the panel gets fitted later, no one will ever know. So anyway, the tiling was laid and it was all grouted. All I had to do now was wait for it to harden sufficiently enough for me to carry on. (2 hours).
During this time, I went onto the landing and started to address the loft access trap situation. (See day 6).
Back into the bathroom again, the toilet was installed (enter the new toilet finally) and the washbowl and pedestal was final fixed. I could have finished the wall tiles at this stage but chose no to because the floor and wall tile grouts were a different colour and would have mixed to easily if they were both wet. So instead, pipe collars were placed around the toilet and radiator feed pipes, a wall unit installed over the washbowl and other accessories were fitted.


DAY 5.
Today was the last day in the bathroom. It involved removing the toilet one last time and finishing off all the wall tiling around the back of it and the bottom row of cuts to the whole room. (Again, it was done this way to hide any discrepancies around the floor tiling edges). The tiles were grouted in and the toilet was final fixed.
The penultimate job was to fit the panels to the bath. I had deliberately not done this previously as the voids below the bath were a good place to store my tools overnight. But with the panels now fitted, it was time to give the whole room a final clean and polish. And then the silicone seals were added around the bath, across the back of the washbowl and round all the internal corners of the room.
Tools carried away and any debris removed, the room was handed back over to the customer who immediately set about filling it with her extras………… (Mmmm, not sure about those. LOL).


DAY 6.
Hang on a minute! I thought the bathroom was done! Yes the actual bathroom only took 5 of our 6 days.
But I still had the loft access problem to address. I had to create a new access on the landing. Day 4 saw me starting this operation with the cutting of a new aperture to the landing ceiling. I then had to trim the aperture. With timber joists around all the sides which would give the weakened ceiling more strength. And me a means of supporting the new access trap.
So today, I had to fit the trap. It was offered up to the ceiling and temporarily secured with speed clamps. While I screwed it to the new timber ‘trimmers’ I had previously fitted. Having done that, all I now needed to do was cut and fit architraves around it to dress the opening.
Finally with the new trap door in place and fully functional. All I had left to do was trim the attached ladder to the right operating length. For it to be safe for correct usage.


So there we go, in just six days, the whole job was completed.
© Andy Robinson, Localad Services Handyman Assist
If you have enjoyed reading this article… Be sure to check out my many other Posts. Or better still, for up to the minute notifications of what I am up to, why not subscribe here for free?


Recent Comments