On initial purchase, this house was the product of two houses…
Or rather, it was a house and a corner shop, roughly knocked into one.
In the image below, Living room 2 and Bedroom 2 was what used to be the old corner shop area.
The original floor plans when I first moved in.
The conversion was very basic, consisting of just a simple single doorway cutting through the two properties on each level. And the general state of the place was not much better than a very basic shell.
The property consisted solely of a kitchen where the units were severely water damaged. The unit panels and worktops were all swollen and crumbling. And the two living rooms had severely blistered plastering and there was only a single electrical socket to each room.
Upstairs there were two huge bedrooms, again with only a single socket in each. And again, there was lots of perished plastering to be sorted. There was also a bathroom with a 40 year old suite comprising a chipped enamel steel bath, a cracked sink and an old fashioned high level toilet.
The house was getting on for 120 years old and it plainly showed.
The hot water system, comprising of a rusty old steel header tank and copper cylinder had burst at some stage prior to purchase. And the water damage included collapsed ceilings, badly peeled wallpaper, blown plaster and sunken floors beneath it.
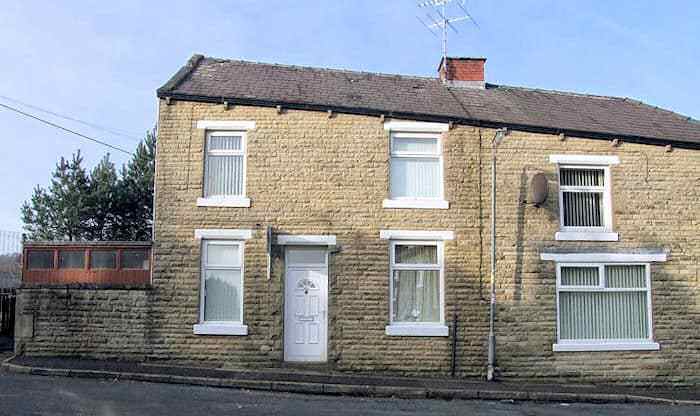
So the property was purchased with a view to fully modernising it. And at the time of purchase, all it really had going for it was new UPVC double glazed windows throughout. Along with a hell of a lot of potential.
But even with its fully re-glazed windows…
The external doors were still old, wooden, un-matching and rotten. Particularly the two doors at the back of the property.
Internally again, all the ceilings were 9 foot high and severely cracked. The window reveals were of a hardboard lined construction with severely cracked and bowed architrave surroundings. They were also very draughty.
What carpets there were, were soaked, dirty and stained throughout. They all had to go.
So, immediately after moving in, the whole house was stripped bare.
This was how the place looked after removing all the unwanted walls
Plaster was hacked away. Load bearing walls were shored up and later removed. I even took out a stair case. And the bare bones construction of suspended ceilings and new partition walls was quickly added throughout.
All the debris was temporarily relegated to the back yard for later removal.
This is the final floor plan with all new walls and doors added.
With the new shell now in place…
The whole house was re-wired and skeleton plumbing and central heating was installed. After that all the walls and ceilings were plaster boarded, and sockets fitted in preparation for a full re-plastering throughout.
It was a conscious decision to finish each room only once. But properly. Rather than attempt to employ any stop-gap alternatives along the way. And during the course of the renovation, the house would be future proofed as much as possible in its completion too.
And in order to minimise any internal disruption to any already completed works, it was decided to work from the upstairs, down. Where the removal of debris through the back doors would not affect any of the downstairs landscaping too much.
S P E C I F I C A T I O N S . . .
Each room in the project was given a choice of different lighting options being main ceiling lighting and subdued wall lighting. These would also be 2-way switched wherever possible. In the bedrooms, there would be a double socket at each side of the bed. For reading lights, alarm clocks etc. And extra power would be laid on for TVs and stereos, hairdryers and the like. A TV aerial point and CAT5 cabling was also to be added for each room.
This is pretty much how the whole place looked before I started working on it.
All rooms would be re-plastered throughout. This would also include new window reveals and sills, door frames, skirtings and architraves. The upstairs ceilings would now be 7’9” high (still above the regulation height of 7’6”). Rather than the old 9’, And a new, properly sized central heating radiator would also be fitted, as would rails for curtains and blinds.
The walls and ceilings would later be given a fully painted finish for ease of future maintenance. And any free standing furniture would be added later, along with fixed mirrors for dressing by. Which would be essential for extra daylight, and creating the illusion of added space.
T A K I N G E A C H R O O M I N D I V I D U A L L Y . . .
MASTER BEDROOM… (bedroom 3 on the above plan)
Being home to a super-king size bed, sliding mirrored robe doors and thirteen drawers… Welcome to the master bedroom…
Uniquely decorated the finished plaster walls were to be party to a suite of fully installed beech finished furnishings. Lighting consisted of halogen down-lights to the ceiling and an individually switched reading light to the bed. The bookcase/display cabinet was made home to an internally wired stereo system and there was also provision made for a wall hung flat panel TV with full internet access opposite the bed.
Behind the mirrored wardrobe doors
This was to be the master bedroom. Home to what seems the biggest bed in the world. Along with a headboard that spanned nearly nine feet across the room. Made from a rounded art-deco edged laminate the headboard complimented the rest of the furniture in the room. With the beech shaker style laminate drawers and black 40mm bench tops.
There were drawers a plenty in this room. With 4 making up the display cabinet area. 2 at the bedside. And a further 7 hidden away behind the confines of the sliding mirrored wardrobe doors.
Also within the wardrobe…
There was a full-width top shelf for storing things like bedding, suitcases, boxes or even archive files as depicted. Below that there were shelves for towels, bedding or jumpers. And there were 2 half height and 1 three quarter height hanging rails for most clothing requirements. Drawers abounded for knickers and socks etc. Even the floor space between the interior fitment and the mirrored doors could be used for parking shoes along.
There was a double convector central heating radiator in the room along with thermostatic valves.
9 power points were added to the room. 4 doubles and one single. And there was also an electrical feed via a switch-fuse for the flat screen TV and another in the display cabinet to power the stereo system by.
MIDDLE BEDROOM (Bedroom 2 on the plan).
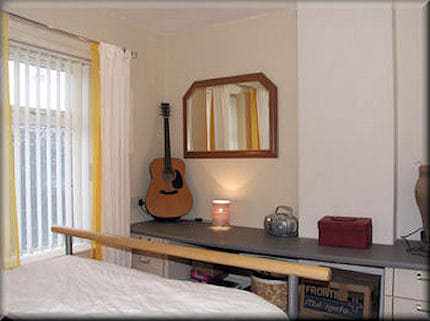
Situated in the middle of the property, this bedroom was built to quite comfortably take a double bed.
Again, there was a choice of lighting to the room. With ceiling lights around the perimeter and a single spot-light over the bed for reading by. There were also static bedside lights to the bedside cabinets switched from the wall by the bed-head. Along with further spotlights sited above the dressing mirror.
The furniture comprised of two bedside cabinets, one with an open ended shelf unit. Two double wardrobes. And two bookcase/display units overhanging either side of the bed. These units were finished in a pear wood with satin chrome bar handles and contrasting mahogany bench tops. Other features included a fully working existing period fireplace. And wiring for a stereo system and flat screen TV that was to be fitted above the fire on the chimney breast.
As you enter this room, probably the first thing that comes to mind is the bulkhead ceiling that appears over the bed. Don’t worry though, there’s nothing sinister going on behind it. It was deliberately built for a half tester feature. Where you drape curtains over the head of the bed. And even though this option was not fully followed through. Yet again this is another room packed with features for one to fully unwind in.
The chimney breast was fully integrated into the final shape of the room.
And still hosts the original fireplace as a feature. The additional furnishings provide a serenity that is essential in any bedroom.
There is a single convector central heating radiator in the room with thermostatic valves. Along with 4 double socket power points to the room. One either side of the bed, one below the mirror for hair driers, straightners etc, and one in the wardrobes for powering the adjacent flat panel TV.
FRONT BEDROOM ( Bedroom 1 on the plan).
This was to be the last of the double sized bedrooms. Features included pigeon holed shelving units for books, videos or DVDs at the doorway, and again, a choice of ceiling or wall lighting. There were two triple drawer units and a full length bench top to the far wall of the room.
The option of leaving a relatively blank canvass like this did have some advantages though. For example, the bed can be positioned either as it is, or for more privacy from the landing, it can be positioned against the bathroom wall facing the window. Both options were designed to give the advantage of wall lighting directly over the bed.
There is a small chimney breast in the room.
And it was initially intended to construct a wardrobe of some sort around this with a dressing unit to the left of it to capitalise on the daylight coming through the window. Other than that, the room is complete in as much as the fabric of the walls, the floor, the ceiling and the electrics.
There is a single convector central heating radiator in the room with thermostatic valves. There are 3 double socket power points to the room, one either side of the bed’s present position and one below the mirror for hair driers, straightners, TV etc.
REAR BEDROOM (Bedroom 4 on the plan).
The last of the four bedrooms, this was home to a single bed. Surrounded by wardrobes finished in high gloss, light blue laminate fascias, with blue pine accents and polished chrome knob handles.
Comprising of one double and one single wardrobe, and two single bridging cupboards. The whole of this span makes up the party wall between this room and the master bedroom. Opposite the wardrobes, there is a bank of drawer units consisting of six single and three double drawers.
The drawer units were finished off with a high gloss black quarry worktop. Along with a blue pine open ended shelf unit by the door. And above these drawers there are three shelves positioned up the alcove in the wall. Again these are finished in blue pine.
Individually switched at the doorway, the lighting is made up with three halogen down-lights to the ceiling. And a single halogen spotlight over the bed for reading with. There is also a double convector central heating radiator in the room. Again with thermostatic valves.
There were also five power points added to the room, 2 double and one single.
BATHROOM.
Electrically, the room required low voltage lighting, extraction, and a shaver point. Power was also laid on for an electric shower unit over the bath. A large radiator was also fitted for the airing of towels on.
The suite would be quite basic, comprising a larger than standard sized bath. A washbowl with pedestal. And a back to the wall toilet pan with recessed cistern. A mirrored wall housing the cistern was also fitted above the toilet and sink.
To finish off, the walls would be fully tiled. The lowered ceiling painted white. And laminate flooring laid throughout. With its two-tone green marble effect tiling, expansive mirror and white opposing walls, the bathroom gives a relaxing and crisp atmosphere to unwind in.
Laminate flooring and a solid oak toilet seat completes the bathroom’s warmth and gives it an additional inviting appeal.
Switched from within the room via a pull switch (English regs). The lighting is made up with a triple spotlight unit to the ceiling, 2 low voltage halogen down-lights above the mirror. And a single down-light on the extraction fan unit over the bath.
LANDING.
The landing was to be a much needed new addition to the house. As previously, in order to get to the bathroom. From what was originally bedroom no 2, you would have to pass right through bedroom no 1. Not ideal in the least. The full height walls surrounding the main staircase were dropped to stair banister height. And pine bookcases were placed in front of it to capitalise on what would have otherwise been dead space.
Another clever use of space was to include a full size desk area where the stair well used to be. This would mean increasing the available amount of floor above the stairs. Whilst not infringing on the head room underneath. It was tight, but in the end, it was successfully achieved.
Electrics were laid on to provide lighting over the stairs and over the desk area. The desk area was switched from both ends of the landing. While the main landing light would be switched three ways, from both ends of the landing and from the open plan living room at the bottom of the stairs.
Heating was provided by means of a radiator opposite the desk.
And hot and cold water services were added to supply the newly added shower room. These were laid under floor along the length of the landing. Originating from the bathroom.
Sockets were also added at both ends of the landing for vacuuming and night lights. And the desk area was given two double sockets to power a computer and all its peripheral devices. The desk area was also wired up with a TV aerial and Cat 5 cabling for internet access. Where a wireless router was affixed for Wi-Fi connectivity to the rest of the house.
New plastering, skirtings and architraves were included. And the walls and ceilings were again finished with emulsion paint.
The landing … Access all areas, bedrooms, office, shower and bathroom.
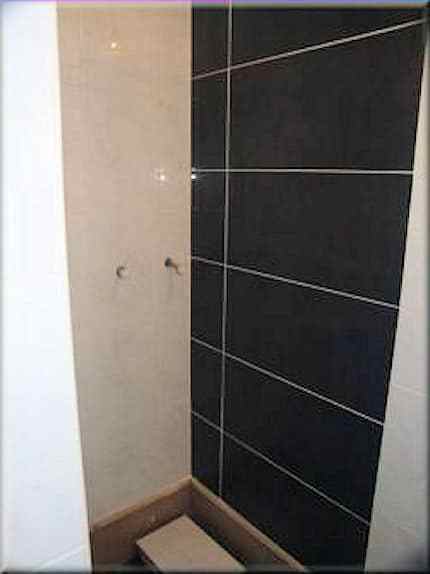
With bookcases, a home office and shower room too. The shower room was directly opposite the master bedroom, offering a quick alternative access to washing facilities. Should the main bathroom be otherwise engaged.
The shower room was not fully completed when the photos were taken, but hot and cold water supplies had been laid on. The plumbing also included flow and return feeds for a heated towel radiator. The room was fully tiled and lighting and extraction had also been catered for. It just required the fitting of an 800mm square shower tray, valve and screen to complete it. The ceiling was of a timber, V-grooved T&G construction painted in white.
Another good use of every available drop of available space is the Home Office area. Whereas most homes usually have to surrender a spare bedroom for this. No such sacrifices needed to be made here. As already mentioned, this area had been developed to house a full size office desk. Above the desk the ceiling has also been squared off to provide overhead task lighting and there were shelves added to provide storage solutions for additional office equipment.
And that completes the upstairs conversion for the house.
So next, we look at the downstairs…
KITCHEN
The kitchen was a major change to the property. During the day, it was noted that a vast amount of sunlight poured through the front windows of the property. And this was to be a major influence in capitalising on it for a light and airy feel to the finished property. So the decision was made to go all open plan with it. This would help fully maximise on the daylight flooding through the area.
The kitchen would be sized just big enough to be fully functional. But at the same time, comfortable enough to move around in. This would mean the exclusion of appliances not fully required within the limits of the room. I had to include a fridge, cooking facilities, sink and the luxury of a dishwasher. Washers, dryers and freezers were not a part of the plan. As these could be put behind the kitchen in a purpose built utility room. Which would give the added bonus of supplies of water and electricity to the back yard, through the back door.
Again, the kitchen would enjoy the benefits of lowered ceilings, new electrics and woodwork throughout. It would also house the combination central heating boiler and gas meter.
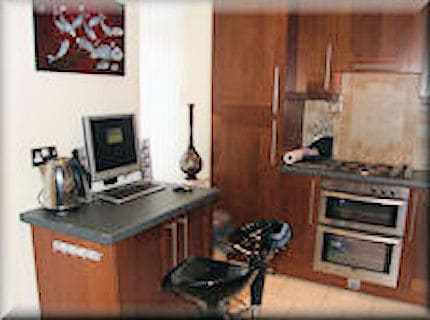
With its open plan aspect to the adjoining living room…
This kitchen was designed with everyday living in mind so it had to look good too.
Hosting just those appliances essential to a kitchen. Like the oven, hob, extractor, sink, fridge and a dishwasher. They were all fully integrated into the ample storage supplied by the Cherry wood cabinets. This kitchen also boasts a host of hidden extras too. Ranging from the neatly hidden away gas meter and combination boiler. To the designer lighting options available. And the in-built computer station. For functionality at its best.
Individually switched from the front door. The lighting is made up with 8 down-lights to the main ceiling. And 6 down-lights on the wall units. Along with the lighting in the extractor unit. Plinth lights come on with the cabinet unit lights. But can be separately dimmed or isolated through a dimmer switch conveniently located within the larder unit, just below the boiler. The central heating boiler (combi) is located within the top section of the larder unit, directly above the fully hidden fridge.
The room was fully tiled.
With painted plaster on the surrounding walls and ceiling.
Provision was also made for a computer station. Which included Cat5 cabling from the broadband router situated upstairs in the home office area. The electrics included 3 chrome plated double sockets on view, A chrome plated cooker point and chrome plated 3 gang light switch for the lighting. In total, there are 7 visible sockets and 6 concealed sockets to work with. There was also a small double convector radiator with standard valves situated below the kitchen window.
UTILITY ROOM
This room was initially built to take up the overflow of kitchen appliances. It would house the washing machine; tumble dryer and freezer. Along with a sink of its own and extra storage cupboards for cleaning products, pet care, medicines etc.
A plastic cladding ceiling was added along with another drying option. This was in the form of an integrated clothes airing rack for drying washing internally. If or when the outside weather is bad. And although not wholly a part of the Utility room, a wardrobe was added to the entrance. This was for the storage of coats, an ironing board and vacuum cleaner. The things that people often forget about.
Heating, electrics and lighting were all added. And a double glazed, glass panelled back door was included to allow more light into the property. The dividing wall between the kitchen and utility room also included an internal window. To enable the full transference of daylight.
So now we have the utility room.
A well thought out solution to those laundry day blues. And much more than just kitchen over spill. It even has a cat flap installed on the double glazed door. I tried to think of everything.
Switched from within the entrance to the room. The lighting is made up with a single 100 watt bayonet fitting bulb suspended from the UPVC plastic T&G ceiling. The double glazed back door also had a cat flap integrated into the glass panels. Which can be locked against incoming, outgoing or both options.
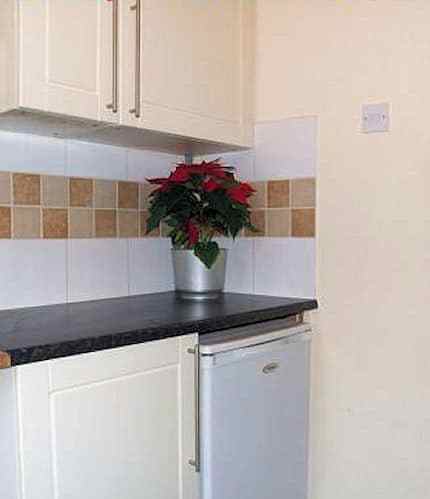
The room is fully tiled between the units with painted plaster on the surrounding walls and ceiling.
And a tall slimline radiator can easily be added adjacent to the back door at any time in the future as the required plumbing has already been laid on for it.
Electrics provided include… 2 double sockets above worktop level. And three sockets under the worktops to power the appliances. The tumble drier had also been vented through the external wall.
LIVING ROOM 1
This was always destined to become the main living area of the house. But because of the open plan design to include the kitchen, a few problems were encountered in making it work properly. The positioning of the chimney breast now meant that in order to continue using the fire. All the seating would either leave you with your back to the kitchen or across doorways. So it was decided to change the focus of the room by re-positioning the fireplace to the wall enclosing the staircase.
This then left a redundant chimney breast intruding into the room. I had the option of removing it but chose instead to open it up and add a bookcase into it, doing the same with the adjoining alcove, thus creating a full feature wall to place a lounge suite underneath.
Electrics were added to the new electric fireplace, and the book cases. To supply stereo, TV tuner box and DVD player/video recorders. And to free up the window wall for even more seating.
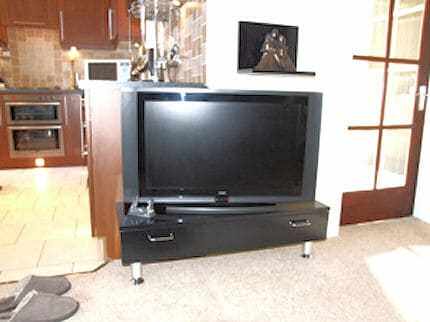
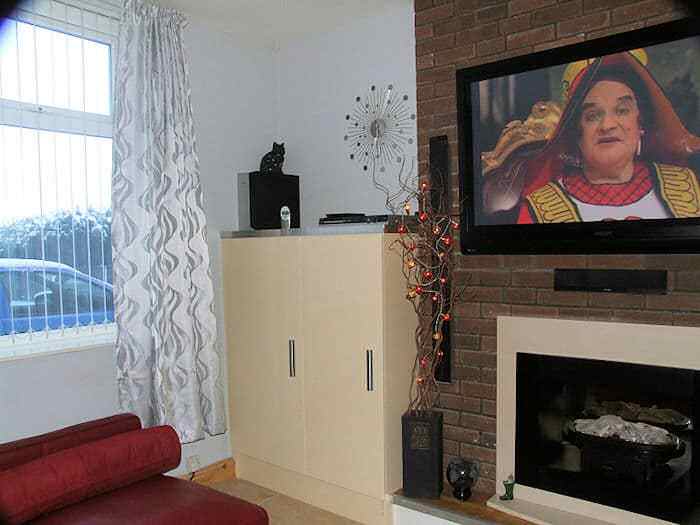
The TV was positioned at the end of the kitchen units on a purpose built unit.
Thank God for flat screen TVs.
For variety of finishes. It was also decided to fit a suspended ceiling. Like those used in offices. And again, to capitalise on the daylight qualities of the house, all doors leading off this room were to be glazed. For night time illumination, the ceiling lights were switched both at the bottom of the stairs and at the front door.
In the good old days, this is what would have been called the morning room. A place for the whole family to gather and go about their daily routines while saving the main sitting room for best.
The room, with its new open plan aspect into the kitchen enjoys the benefit of being flooded with natural daylight during most of the day. And even with the evening sun at the rear of the house. With the clever use of glazed doors and internal windows, the sunlight just never seems to stop.
As you can see, the feature fireplace also changes the focus of the room from what it used to be.
Where the chimney breast was (now the bookcases), and a slim line LCD TV fits nicely between the kitchen and utility room. Opposite a corner suite that was specifically made to measure to fit the room perfectly. Clever use of lighting also sets many different moods for in the evening, when the sun finally sets.
Switched from the front door and the bottom of the stairs.
The lighting is made up with 2 banks of 5 halogen lights to the main ceiling. Although it is very rare they get used. Preferring instead, to use the lighting given off from the kitchen units, the light at the bottom of the stairs and the variety of lights used on the feature fireplace. All of which can be individually switched from its front face. The fireplace also includes two electric fan heaters switched from within the front of the unit.
Electrics also include 2 double sockets and 2 single sockets. Fitted around the room perimeter. With additional sockets positioned within the bookcases to power up the television and stereo equipment installed within it. There is also a double convector radiator with thermostatic valves mounted on the wall above the suite and adjacent to the window.
WC
Having now created a four bed-roomed property. It now made sense that if it was ever to be fully inhabited. Another toilet would at some time be needed.
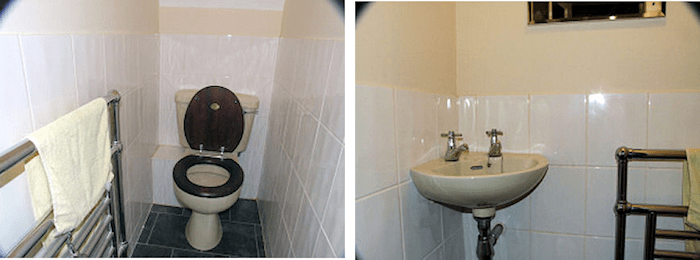
So to maximise on the ‘dead’ space under the stairs, it was decided that this was where to put it. The room comprises a close coupled toilet, corner washbowl and heated towel rail. It is half tiled with painted walls and ceiling above. Bevelled edge mirrors were also added and the toilet comes with a solid mahogany seat.
Karn Dean Vinyl tiling to the floor finishes off the room quite nicely.
CLOAKS
There’s nothing more disheartening when entering a house. Than having to battle past an array of coat hooks with coats spilling out into the hallway. So with this in mind it was decided that proper provision should be made for them.
Situated en-route to the utility room, opposite the downstairs toilet I have added a much welcomed addition to any home… Storage space.
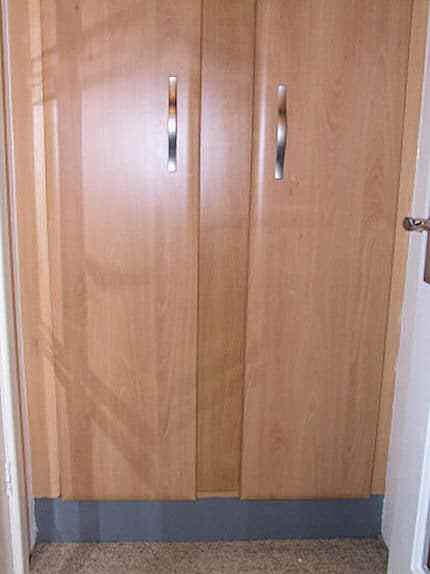
It was a custom built wardrobe finished in beech effect vinyl laminate.
The wardrobe featured a three quarter height hanging rail for all those coats that seem to clog up many a hallway. And a convenient top shelf was added for other storage.
And like previously mentioned. It also provided a useful solution for storing unsightly essentials like vacuum cleaners, mops and brushes or even step ladders.
Featuring a stainless steel effect plinth and cornice to the top, the wardrobe has two full height doors with a rounded art-deco edge to them. The handles were in a satin finished stainless steel.
ENTERTAINMENT CENTRE
A lot of thought went into this room in defining its function. The house cried out for a fully defined dining area. But to use a whole room of this size would have been a huge waste. While living room 1 was for everyday living, living room 2 would be a lot more formal. Yes it would have dining facilities, but what else could it do? The advent of home cinema was to decide the final outcome of this room. Whereby it was fully designed for the sole purpose of entertaining.
This room was the part of the property that was formerly the corner shop. And because the terrace was built on a hill, this room was also 20 inches lower than the rest of the property, creating even more problems.
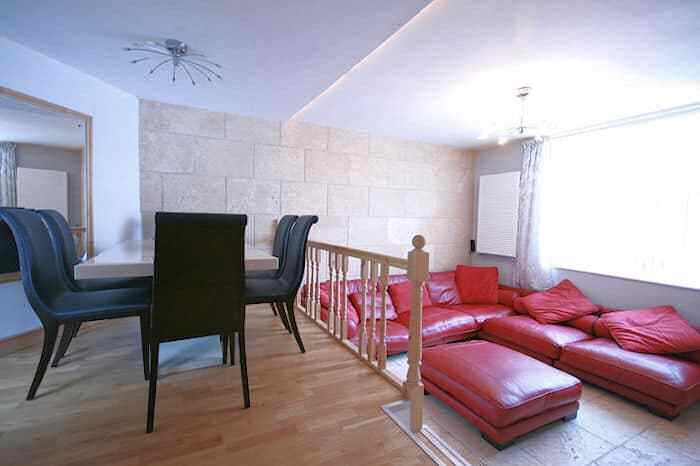
By removing the existing second staircase and the wall surrounding it. The room was opened up for its full potential. As mentioned, the room had two main functions to fulfil. Entertainment and dining, so it was decided to fully define these separate areas. Whilst leaving the full scope and size of the room intact. And this was achieved by making the room split level.
Entering through the door you would immediately be in the dining area.
The same level as the rest of the house. But the sitting room/home cinema area would remain at its original lower level.
And because of the more formal feel of the room. A degree of additional opulence was factored in with the use of natural products like travertine tiling to the rear wall. That being carried through to the under-tile heated floor of the seating area. A richer looking, natural oak flooring was used in the dining area. Under which the created void had been left deliberately accessible.For the storage of items like Christmas decorations or any other seldom used belongings.
And due to the now higher floor level to the dining area.
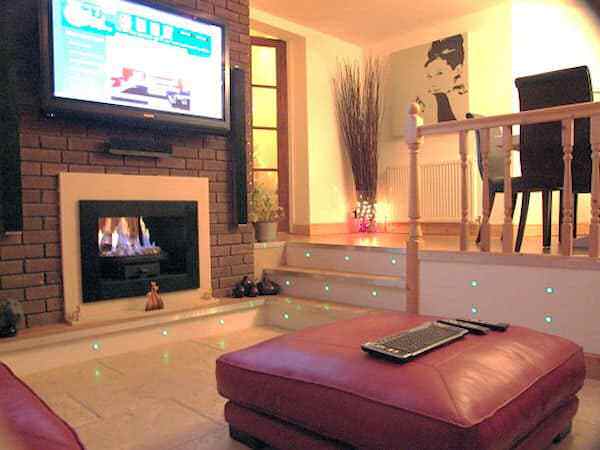
The second of the back doors was taken out and a window added in its place. A gas fire and stone surround was fitted into the existing chimney breast. And in keeping with the rest of the house, the remaining walls would be painted. A wooden banister rail, new skirtings and window sills were also added.. And spindles to safely separate the two different floor levels.
To house the home cinema systems, a double cupboard was added adjacent to the chimney breast. With an entertainment centre computer piped through to the 60″ plasma TV. Along with additional sound systems and gaming consoles.
Specifically designed for entertainment and social gatherings.
Utilising both natural stone and polished oak flooring. The room shouts of opulence. Add to that the feature lighting round the split level floors and dimmable main lighting. The room also offers a luxurious welcome to all.
As you enter the room. Raised 500mm above the main flooring, the suspended polished oak floor defines the dining area. Provision was also made for illuminated under-floor storage to this area. Travertine tiling to the lower floor and back wall also means the home cinema area is tied neatly in.
Switched from within the doorway of the room. 2 separate dimmable light fittings (one for each area) make up the main lighting. Which each host 10 halogen bulbs. Other lighting includes LED lighting around the stairs and the dividing wall between the two areas. These lights slowly change colour whilst in operation, providing a relaxing ambient mood to the room in the evening.
The dining area has a huge framed mirror fitted. Giving it the illusion of extra space and light to the room.
The un-tiled walls are of painted plaster as is the ceiling. There is also large double convector radiator to the main seating area with designer valves fitted. To the dining area, there is a single convector with standard valves. This provides sufficient warmth whenever you may need it.
Within the 2 side cupboards is the electric meter and all the electrics for the home cinema system. A media centre computer, games consoles and sound systems. A fully vented cupboard next to the chimney breast allows storage of the aforementioned components whilst in use. The cabinet units are in a high gloss cream to compliment the stone fire surround and travertine flooring. They have stainless steel bar handles.
Five sockets strategically circle the room perimeter. For accessories like additional lighting. Or even use of the dreaded vacuum cleaner. There are two windows to the room, the largest being at the front with a smaller one at the rear. They both have vertical Louvre blinds and opening lights to them.
Apologies for the bad quality of the images used in this post. They really don’t do the place any justice.
Originally purchased for the princely sum of only £16,000.
The modernisation of this property to its current standard realised the selling price of £144,950.
And even after all the expenditure on the refurbishment, that’s quite a tidy profit in anyone’s book.
If you have enjoyed reading this article… Be sure to check out my many other Posts. Or better still, for up to the minute notifications of what I am up to, why notsubscribe here for free?
That’s why I started this business in the first place!
*****
SATISFACTION GUARANTEED!
During any project you may have, I promise you I’ll always show up on time, maintain an impeccable work space, and treat your home as if it was my own.
And, if you aren’t 100% satisfied with any of my services, you don’t have to pay me a single cent until I make it right for you.


 Sockets were also added at both ends of the landing for vacuuming and night lights. And the desk area was given two double sockets to power a computer and all its peripheral devices. The desk area was also wired up with a TV aerial and Cat 5 cabling for internet access. Where a wireless router was affixed for Wi-Fi connectivity to the rest of the house.
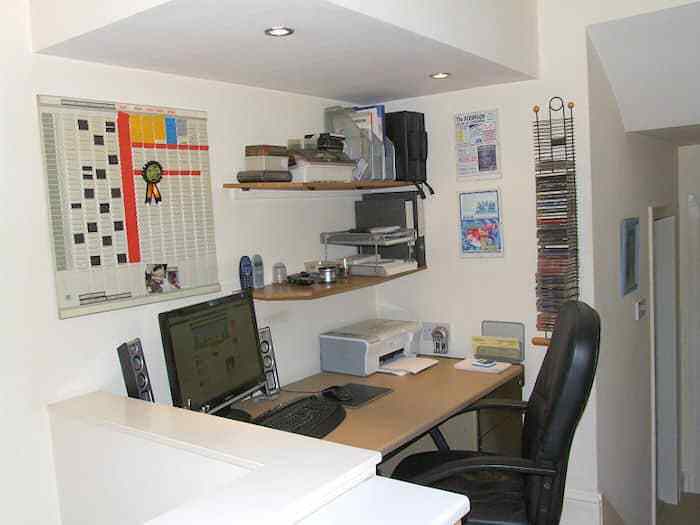

 The room was fully tiled.
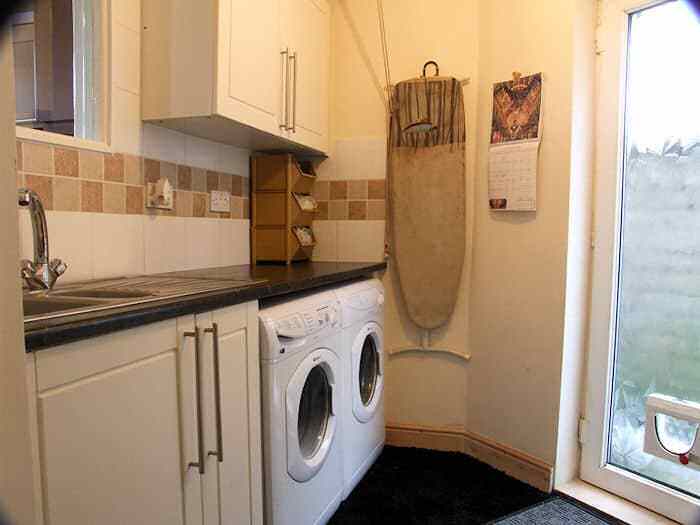
 Switched from within the entrance to the room. The lighting is made up with a single 100 watt bayonet fitting bulb suspended from the UPVC plastic T&G ceiling. The double glazed back door also had a cat flap integrated into the glass panels. Which can be locked against incoming, outgoing or both options.
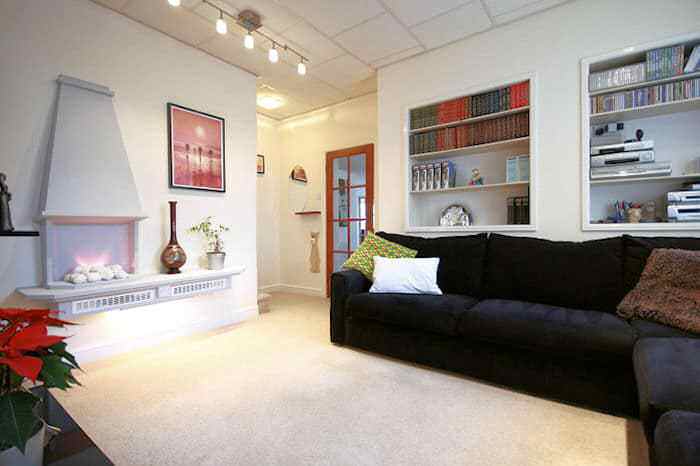
 Electrics were added to the new electric fireplace, and the book cases. To supply stereo, TV tuner box and DVD player/video recorders. And to free up the window wall for even more seating.
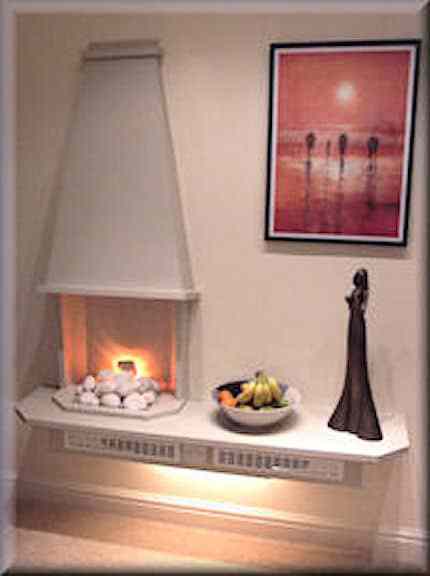

 Situated en-route to the utility room, opposite the downstairs toilet I have added a much welcomed addition to any home… Storage space.
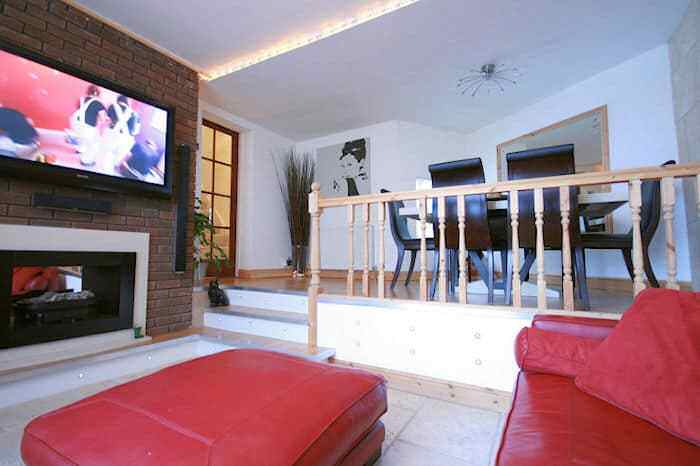


Recent Comments